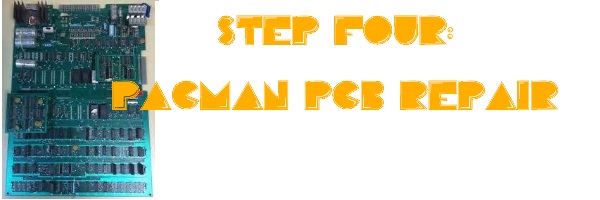
Before we begin with common problems with your PCB (Printed Circuit Board) or in layman’s terms your Pacman board; (This board runs the whole play of the game and it looks like this inside your game.)
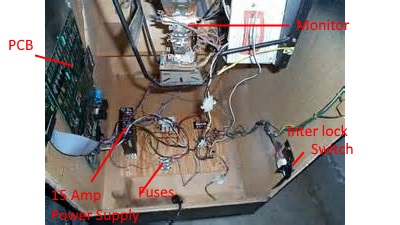
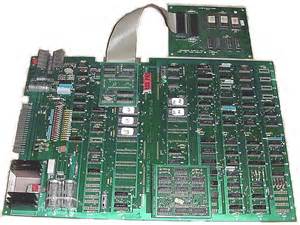 MS Pacman PCB
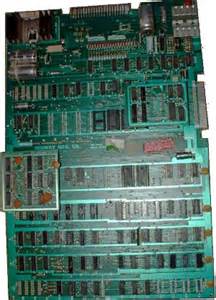 Pacman PCB
IF You feel you can’t repair your Pacman Board and just want to send it off for Repair Then Click Here For this Serivce:
We first need to identify what type of problem your machine is having. Please select from the options below:
-
-
-
- I can hear the sights and sounds of the game, but I can’t see anything on the monitor….Skip to the Pacman Monitor Repair Post.
- When I put my coin in the game; it won’t start when I push the start button. Go to the Arcade Start Button Repair Post.
- My game seems to work just fine but I can’t move my pacman either to the left or right during play; its stuck moving in one direction– or I can’t move it at all…Go to the Pacman Joystick Repair Post.
- My Pacman machine won’t register coins or doesn’t give me credits ..Go to the Arcade Coin Slot Repair Post.
- I have a stand up game but my screen now flips upside down…Un Ground Pin R. Refer to the cocktail table game post.
- My Pacman picture is wavy, distorted, it won’t center, or is rolling across the screen. Go to the Pacman Monitor Repair Post.
- Everything works but I hear no Sounds…Go to the Pacman Sound Repair post.
-
My game has nothing but Gibberish on it. First Goto to troubleshooting Whats on my screen then return to the PCB REPAIR Post.
- My monitor comes on. I can hear the hum and crackle of it warming up, but no game shows on my screen…For this problem it’s more than likely the PCB just isn’t generating the “game” for the monitor to display much like disconnecting the DVD player from the TV set. It’s not your monitor’s fault that no picture is getting to it. You will first want to rule out whether you have a bad power supply or a bad PCB board. The PCB’s are usually very reliable and unless wired wrong most often times will work for a long time so let’s lean towards having a bad power supply under this scenario. First, Plug back in your game. If you have a 15amp power supply as explained in Fuse and Power Supply post, then Check to see if the LED light is on.
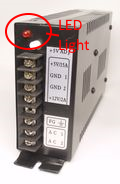

If not, more than likely you have a bad power supply and will need to order a new one. Since these are relatively cheap it’s probably a good idea to just go ahead and replace it anyway now to make sure.
-
Once you have the new one, go to the Installing a 15 amp power supply page in order to see how to install it or to trouble shoot your further. If you still have the old style power supply as mentioned and defined in the power supply section then it’s probably best to bypass this now with the new switching 15 amp power supply in order to get you’re machine up and running again. If you do have the old power supply you may first want to check the fuses that regulate the power +7 volts on the bottom of the game floor beside the main fuses. With game unplugged! Follow the fuse procedure in the fuses section to do this, however if the fuses all test good then you have a power supply problem best to just replace it now.
- Everything’s on, but the screen is all scrambled with letters, lines, numbers etc. OK you have a board problem if this happens, but even more specific an Eprom or Rom problem in layman’s terms “a chip” problem, or a bad connection somewhere. At this point if you have this problem you can do one of two things, you can order a new working Pacman or Ms Pacman PCB board and refer to the How to replace a Pacman PCB post.
-
-
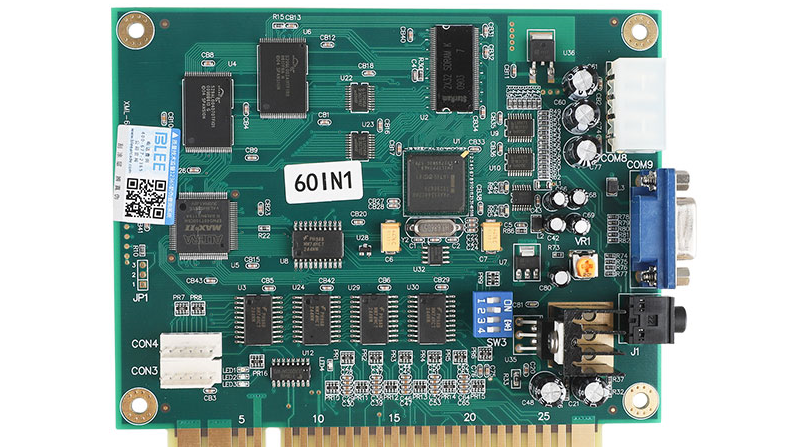
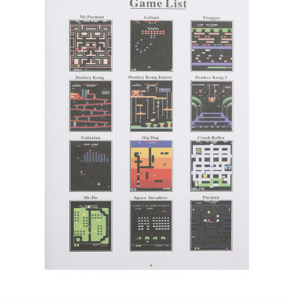
Just in case you’re into a simple fix and you feel you lack the expertise to fix your game. There is a cheap fix now for all your non working Pac-man monitors or a Pac PCB. Now you can replace the heavy, maintenance prone CRT arcade monitor with a light simple to use 19″ computer monitor! Also you can replace a non working Pacman or Ms Pacman PCB board with the inexpensive 60 in 1 multigame board and not only does it run Pacman and Ms Pac, but also Galaga, Donkey Kong, Centipede, Frogger, Scramble, Pacman plus and many more of the old 80’s classics. The JAMMA 60 in 1 Board plugs into a computer monitor cable port and works perfectly as a replacement PC VGA monitor for your broken Pacman…Watch Below:
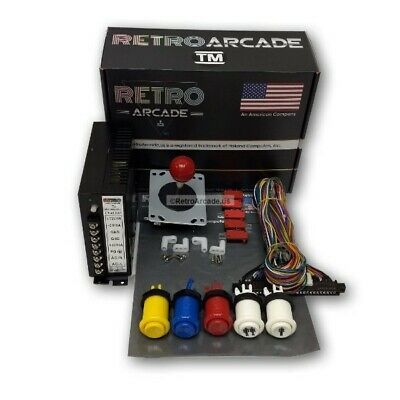
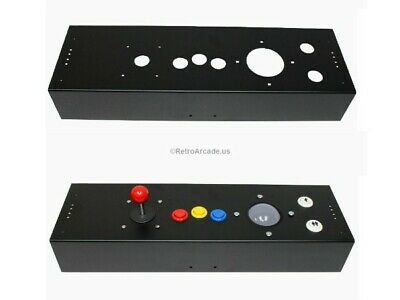
What you will need to upgrade your cabinet to a Multicade 60 in 1:
Where to buy a 60 to 1 Multicade PCB Board under $40!
Where to buy a JAMMA Harness, joystick, buttons, Power supply Kit
Where to buy a Joystick Panel with 3″ trackball
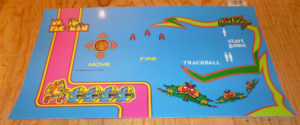
Where to order a Multicade Overlay and how much
Game Will also play in cocktail mode and you can choose the games you wish to have displayed to play. This kit can go in any arcade cabinet and can be used with a replacement 19″ VGA PC monitor or larger monitor if your game cabinet can hold it. To watch how to install it here:
Info about Pacman’s Eproms And Roms and parts of the Pacman PCB.
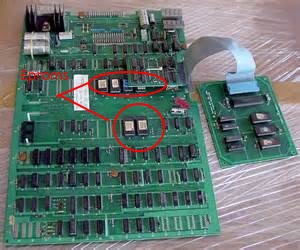
To Find A Pacman Or Ms Pac PCB Click Here
Almost all original Pac man boards used masked Roms (9332Bs) that are black, some of the latter Ms Pac Mans had eproms (2532s) with white paper stickers over the windows. The pinouts of the 9332B and 2532 are compatible.
To identify rom chips read the top line of print….”0072-M932D-”
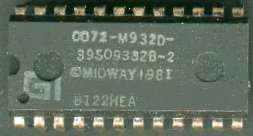
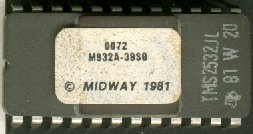
- M932A-39S0 = 6E
- M932B-39S0 = 6F
- M932C-39S0 = 6H
- M932D-39S0 = 6J
- M932E- = 5E
- M932F- = 5F
Note that the letter after 932 is the position indicator.
Where To Buy A Speed Up 6F Chip
I am not sure of how to read the second line but you will notice the 9332B, which is a reference to the format of this chip. The 9332 is the equivalent of a 2532.
The second chip (right side) is a EPROM.
Third line is the MIDWAY Copyright (1981) for most Pac Man games (though it was introduced in 1980).
Proms

There are 2 color proms that dictate the final color of the maze and character. Pac Man & Ms Pac use the same color proms, other games may vary (see “How many games run on the Pac Man board?).
- 4A PM 1-4 – 256 x 4 PROM (82S126N, 1M 5623, 63S141) Tri State 82S129N will work.
- 7F PM1-1 – 32 x 8 PROM (82S123N, 7603)
Note that these color Proms are only half full of data which is normal and allows for a switchable design if you wanted to make new color proms & toggle the highest address line manually.
Without getting too technical, what you need to know about the chips (Eprom, Roms) is that they can get dirty or become un-seated overtime; or their pins could break or become seated improperly. Sometimes if you’re game is experiencing odd graphics scrambled letters etc…Then the chips are the culprit. You have two options at this point. Take the whole PCB out and simply buy a new one and plug it back in.
To Find A Replacement Eprom Or Speed Up Chip 6F try here
Or, You can try to clean and re-seat each of the eprom chips. To try this follow the procedure below:
First— what you need to do, is to take the PCB out of the game. To do this, Unplug the game first. Then find the PCB in your game. Unhook the wiring harness that connects the game and then locate the screws if any that are holding the board to the wall. When found unscrew the bolts (screws) holding the board in place and remove it intact and lay it flat on a table. Make sure if you have a MS Pacman board that you keep the daughter boards in tact as well.
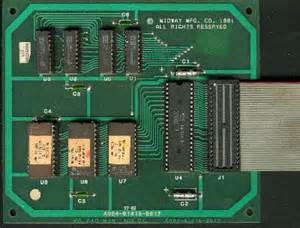
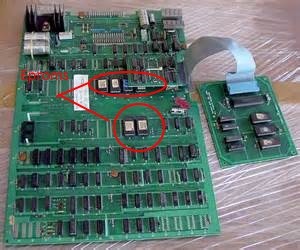
Where To Find A Replacement Daughter Card
Second— Take a flat head screw driver and begin with chip 6F. Or you can use a IC Chip Tool to lift the Eprom.
Gently slide the screw driver between the Eprom and it’s seat and gently pry up.(Be very careful not to bend the pins!!!!) Lift on one side (south side) then go to the top side (north side) of the chip until it comes loose from its seat at the same time.
Third–Now inspect the chip looking for dirt, bent or broken pins etc. If you see that it is dirty with the end of a pencil eraser and with your finger behind the pins gently rub the eraser over the pins to remove the dirt and grime.
Fourth…Once the chip is clean then re-seat the chip back into its socket. Be Very careful not to bend or break the pins trying to get the chip back in the seat. Also make sure ALL the pins are connected and slid back down in their seat and didn’t bend underneath. Check this by inspecting every pin placement making sure they are all seated.
Fifth–Now go to the next chip and repeat the same procedure until you get all the chips cleaned that can be unseated.
Sixth–Now plug the PCB back in the game a re-try. If the scrambling is gone congrats you’ve fix it. If not re-inspect that there are not other Eproms or Roms that you might still need to try to clean or fix. Also check in the advance troubleshooting post for further fixes.
Replacement rom sets are available online. (Where to buy a Pacman Speed up chip click here) You may want to order these first as a cheap try before buying a new PCB.
Multi Pac Items And Cheats
Several PCB Multi Pac Kits were developed and became popular through out the late 90’s and 2000’s. Among the best of these were the Clay Cowgill Multi Pac kit and the Super ABC Two Bit score kit. These kits plugged into an original Pacman or Ms Pac man PCB and allowed multiple pacman games to be played off 1 PCB board. Also allowing the player to continue where last died and save the high scores of the game through unplugging. They are becoming very rare but I still see a few land on Ebay every now and again.


Everything works but only green color on screen so you can’t see the walls, can play it if you know where they are from experience. What do I need to do to fix the monitor, replace a chip on the board or the whole monitor?
Hello, I have a “vintage” stand up Ms Pac Man. I put vintage in quotes because I don’t know the exact age but we’ve owned the unit for 20 years. Game suddenly froze and ghosts are stuck in one spot and won’t respond to the joystick. Tried to unplug and then power back up without success. Still stuck. I have no experience with the innards of the machine. Is there a trouble shoot process?
thanks
Try dip switch 7 and 8 on pcb board…consult manual on my site for location of dip switch…they should be turned to the unfreeze or i think the dip should be in “off” position ..try either way and see if it starts again
Hi,
I have a problem with my original yellow upright PacMan.
The monitor powers Up, but there are just a few flickering random objects on the screen.
Any ideas?
Thanks!
Ash
Goto my page http://www.fixyourpacman.com/trouble-shoot-by-pictures-whats-on-my-screen/ and scroll down through the pics see if anything matches whats on your screen and the solution/problem will be printed under the pic
Thamms for that, think I’ve found a similar pic. Under it it says
‘Just a few random objects on screen.
4M video RAM bad’
Being a complete novice to this, any ideas how is go about fixing it?
Thanks for your continued help!
Ash
You could try to look at the 4a chip on your board. Unseat it as show on the eprom section and clean the pins off then try and re-seat..but really carefull not to bend any pins underneath and make sure each pin is seated where it goes. You can buy a new 4a chip here https://www.ebay.com/itm/Midway-Pac-Man-Plus-Color-PROM-set-7F-4A/192512408069?hash=item2cd2a23a05:g:1iMAAOSwwc1Z4nvL
That’s great, thanks for your help, I’ll give it a shot. Great website, loving looking through it. Ash
Hi,
So I recent purchased an old yellow upright arcade pacman game from my grandparents but on the ride over something must have gotten jarred loose because now when I plug it in we can only play the original pacman (used to be able to play 24 other games I think) and in that pacman game only the bottom half of the “maze” is lined up and the top half you can stroll right through walls. Any help would be much appreciated. Thanks in advance
Jack
Hi,
So I recent purchased an old yellow upright arcade pacman game from my grandparents but on the ride over something must have gotten jarred loose because now when I plug it in we can only play the original pacman (used to be able to play 24 other games I think) and in that pacman game only the bottom half of it is working and the top half is just the bottom half overlaid on top of it. So for example when I move pacman and eat up the dots on the bottom those same dots get eaten on the top half. Any help would be much appreciated. Thanks in advance
Jack
Yes sounds like u have a clay cowgill 24 in one kit installed on the pcb board..or one of mine..since I made many of them after he stopped due to the Namco threats to sue…then they threaten to sue me also..so I stopped making his kit also…but yes they can easily become unseated….my suggestion would be to unplug the game and then reseat the kit or press down on it if youve visually looked to see if any board or Eprom has come lose…uve got pins from the boards or Eproms not seated..goto the Eprom page on this site to learn how to seat chips..if confident enough take the pub boards out lie them on a flat table and reseat…make sure all pins go in correctly
Hi,
I have a Pacman cocktail table that was working perfectly since I got it about 2 years ago. Yesterday I left it on for a few hours and suddenly when I play there are now two Pacmen moving sort of parallel to each other. The startup screen looks totally normal and the maze looks normal but Pacman and all the ghosts are doubled and seem to be moving through the maze walls. I looked through the “Troubleshoot what’s on my screen” page and nothing seemed to be a match. Any idea what the problem is? Any help is much appreciated. This website is incredible and I respect your wealth of knowledge on the subject. Thank you for sharing it with us!
Goto whats on my screen page on this site and u should be able to find the problem..sounds like a short from a rom or Eprom on the board
I looked through and I don’t see any image that has the mirrored characters like I am experiencing. I’d be happy to send you a picture of what I’m talking about.
What’s the purpose of the smaller board on a Ms Pac, that connects w/ a ribbon cable to the main board? I was switching out an unworking board for a new one. New one did not have this little side board. I f*cked up and broke two pins (stupid rookie mistake) and am trying to determine how screwed I am. Since new board had emprom/prom (not sure which . . . ) in place of where ribbon cable would go, I installed the main board w/o the smaller one. Game seems to run fine but picture on monitor is cruddy. Not sure if that is bc I need smaller board?? Please help this dumb rookie! 🙂
the daughter card makes the pacman b aord ms pac…u can take it off and put the z80 chip in docket 6b and change row 5 to Pac Eproms also 4f and 7a but might be simpler to just buy a need ribbon cable or complete daughter board from the parts page here http://www.fixyourpacman.com/parts-for-repair/
I have a Mrs. Pacman standup original. The game mostly works perfect with sound, but if you bump the machine or move joystick to hard, sometimes the game flickers and will either restart or just get a crazy screen with lines/numbers everywhere. If you jiggle the board sometimes it will just fix itself, but not fun to play for a few minutes and keep starting over. Any suggestions? I’m thinking a new board will definitely help.
You just have a bad connection. Try to take out the board and unseat all the eprom chips and re-seat them. How to do this is on the eprom page of this site and the pcb board page. Once you re-seat them correctly this problem will go away